Shopping for a new icon? Look no further. Learn how to create a
custom shopping basket icon for your next web design project. We’ll
combine 3D qualities with a flat look. You’ll need a firm understanding
of Adobe Illustrators tools to complete this tutorial.


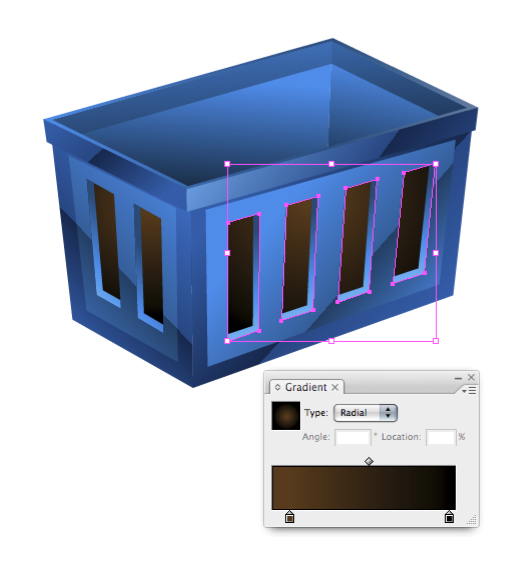
Select each window shape on the face of one side of the basket and give them a brown to black gradient simultaneously. This will guarantee that the gradient is uniform and consistent across all the windows.
Next, rotate the boxes so they’re all on slightly different angles. Give them a warm brown gradient making sure to vary the brightness of each side of the box to create a more realistic look.
Using the Pen Tool draw a line where the dotted line is. Your line won’t need a fill or stroke color. The red line below is just for representation.
If you would like to further edit the color or shape of the boxes double-click on them to enter into what is called Isolation Mode (Illustrator CS3 and up) and adjust them to your liking.



 Subscribe to the VECTORTUTS RSS Feed to stay up to date with the latest vector tutorials and articles.
Final Image Preview
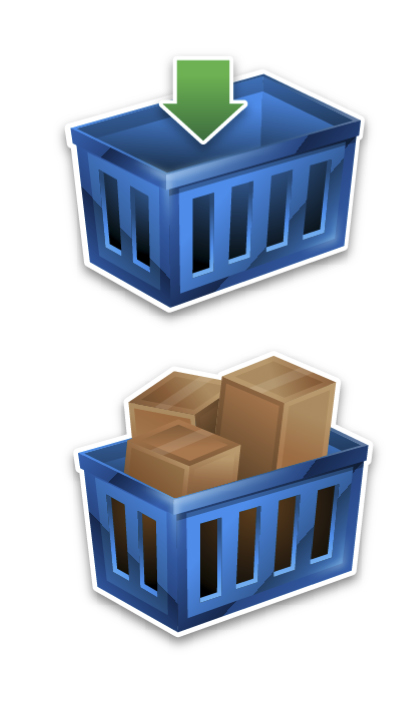
Below is the final design we will be working towards. Want access to the full Vector Source files and downloadable copies of every tutorial, including this one? Join VECTORTUTS PLUS for just $19/month. You can view the final image preview below.
Step 1
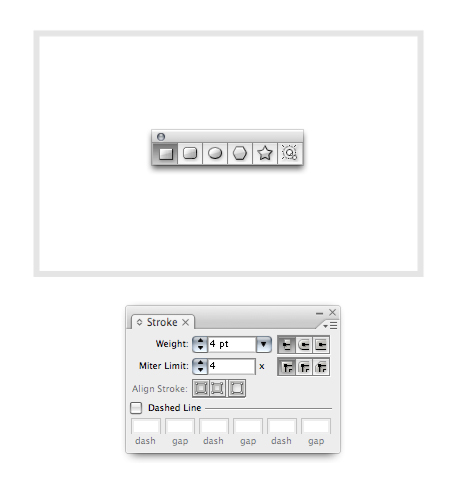
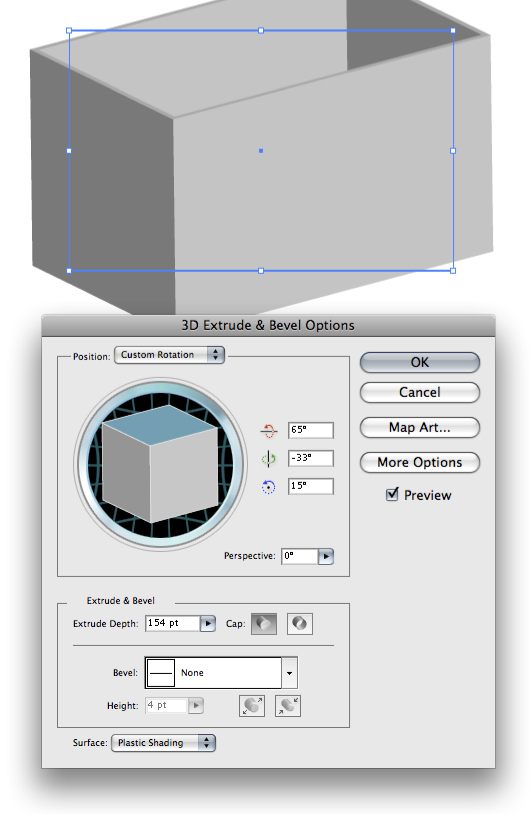
Start by selecting the Rectangle Tool (M) and drawing a rectangle with a 4 pt stroke. Ensure that you are using a light color for the stroke so you can see what you’re doing when you apply the 3D effect. Do not apply a fill to the rectangle.
Step 2
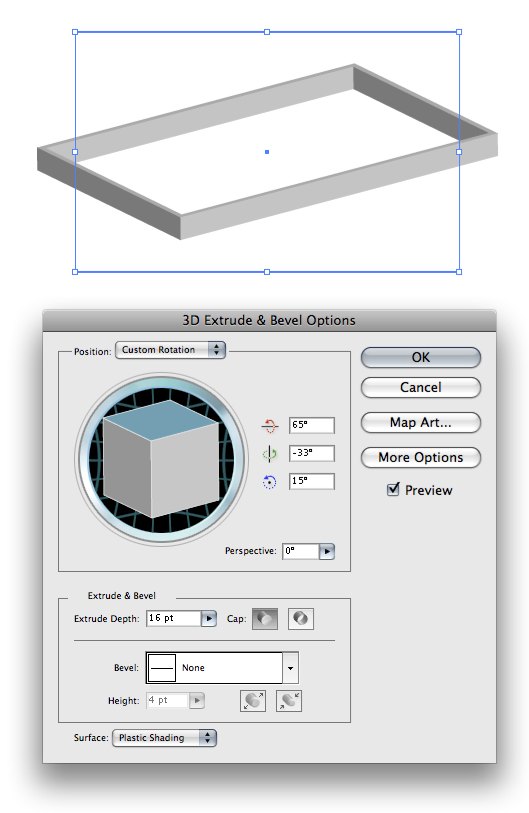
Go to Effect > 3D > Extrude & Bevel. Give your shape a rotation for the X, Y and Z axis’ and an Extrude Depth of about 16. Click OK. Copy and paste this shape to use for the next step.
Step 3
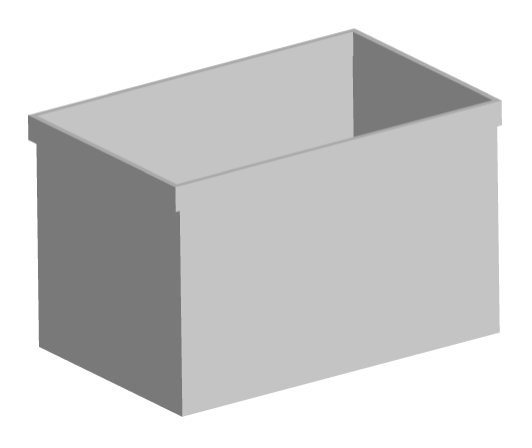
In the Appearance Palette double-click on 3D Extrude & Bevel. Enter a much higher Extrude Depth and click OK.
Step 4
Put the shapes on top of each other and make either the top or bottom shape slightly smaller or larger than the other. This way you can tell there are two shapes that comprise the basket. This is what your artwork should look like right now.
Step 5
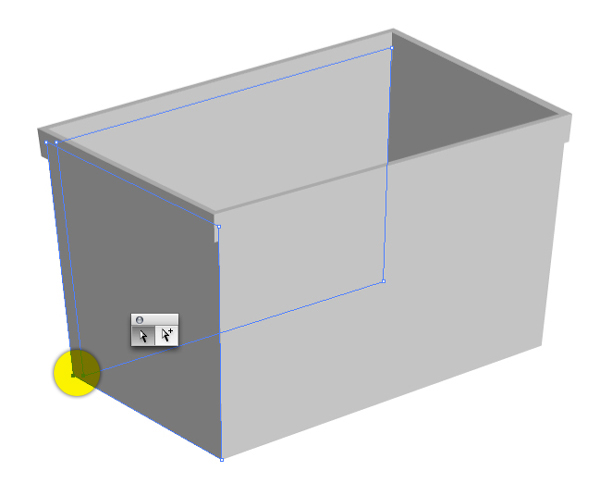
In order to manipulate the shape further you will first need to go to Object > Expand Appearance. Using the Direct Selection Tool (A), drag to select the points as highlighted below. Move the points inward a little so the whole basket is a little skinnier at the bottom.
Step 6
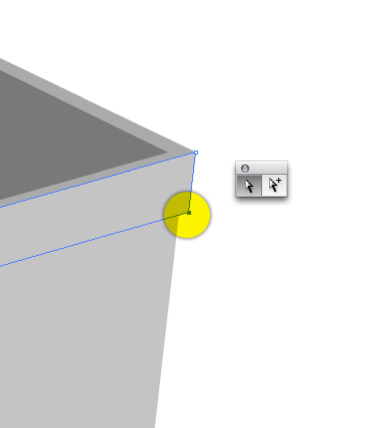
Ensure that you move the points around the top edge of the basket too.
Step 7
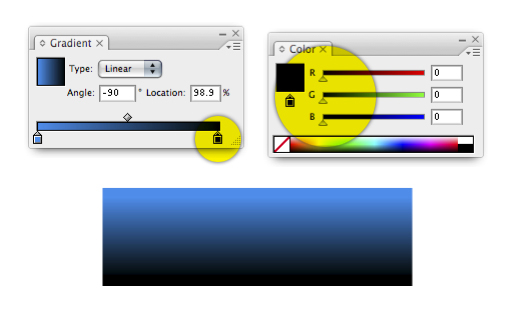
We’ll apply a blue to black gradient on our basket. When working with black make sure you use a black that has zero values for R,G and B. This will give you a much richer black.
Step 8
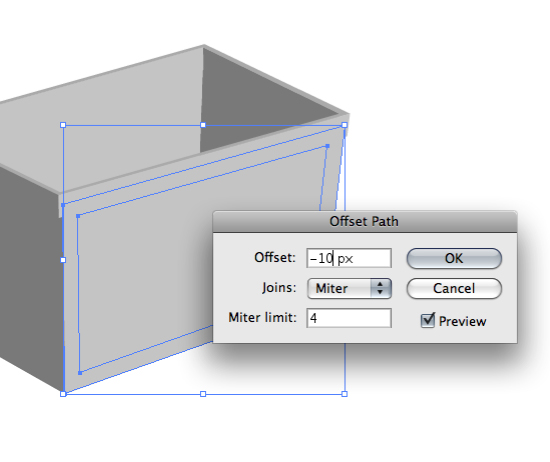
Select the face of the basket and go to Object > Path > Offset Path. Enter about -10 and click OK. This will create an inner area with the same proportions of the larger shape. We can then apply two different colors to the shapes to give the basket more visual interest.
Step 9
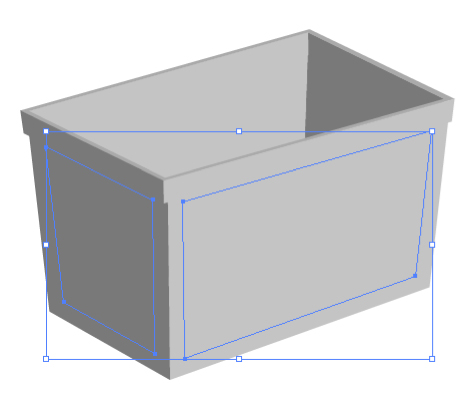
Give the other face of the basket the same offset path treatment.
Step 10
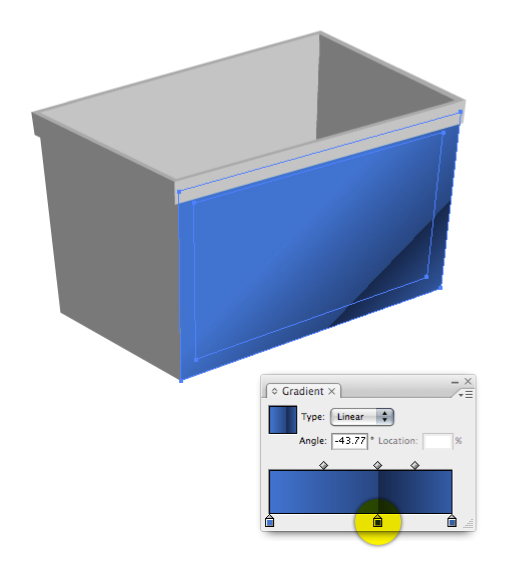
If you want your gradients to be consistent across multiple shapes than make sure you select both shapes at the same time. I’ve created the look of a very reflective surface by abruptly changing the color in the gradient. Getting a realistic reflection will take some experimenting.
Step 11
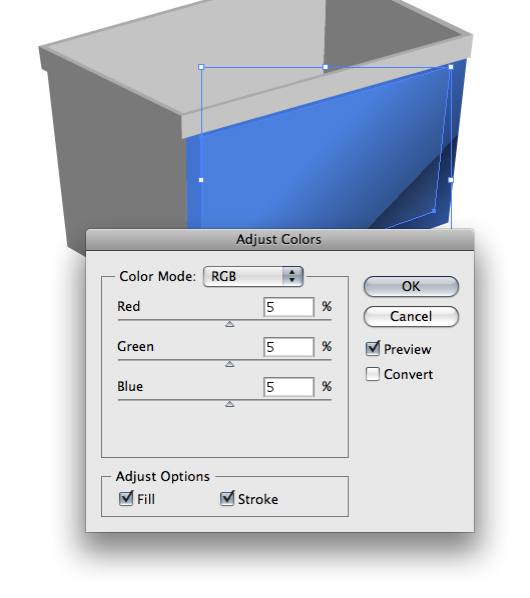
Select the inner area on the face of the basket and go to Edit > Edit Colors > Adjust Color Balance. Enter 5 for each value and click OK. This will make the blue color 5 percent lighter on the selected area and give the impression of a subtle change in the surface of the object.
Step 12
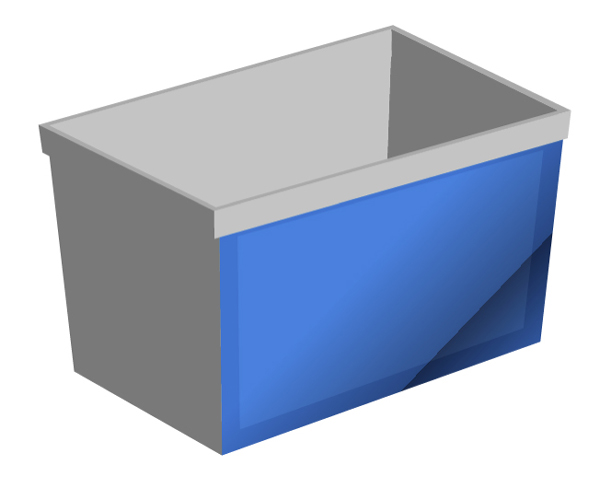
This is what your artwork will look like right now.
Step 13
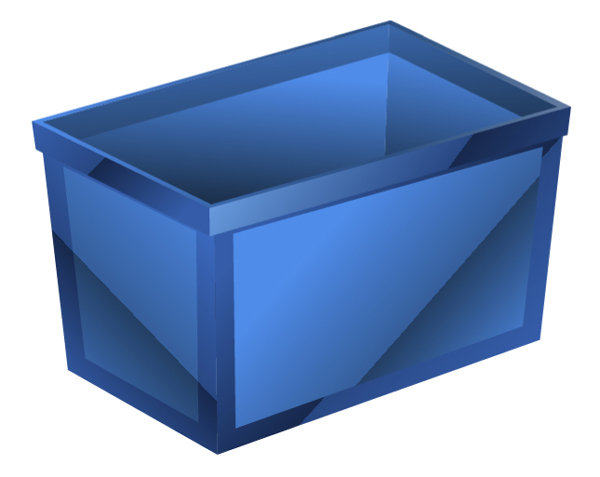
Continue to give the rest of the basket gradients. Observe how the reflective look is not too overdone. I tend to give each face of the basket no more than one abrupt color change. But of course, rules were made to be broken. Just keep trying different angles and intensities of color until it looks right to you. Also notice how the inside of the basket does not make much use of a reflection, only a dark to light gradient.
Step 14
Making the holes that cut through the basket is easier than you may think. Using the Pen Tool (P), draw a shape like the one below. Ensure that you follow the lines of the basket. Basically, making sure that your top lines are parallel to the top and bottom of the basket and your side lines are parallel to the sides of the basket.
Step 15
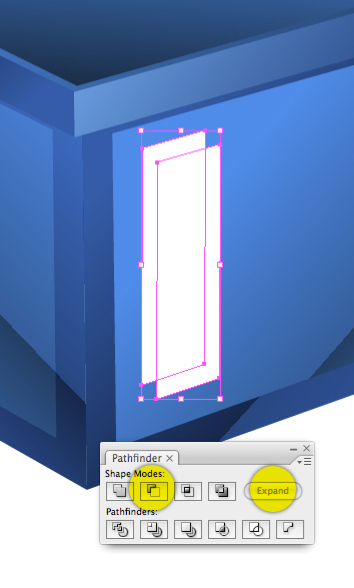
Copy and paste the shape and overlap them as shown below. In the Pathfinder select Subtract from Shape Area followed by Expand.
Step 16
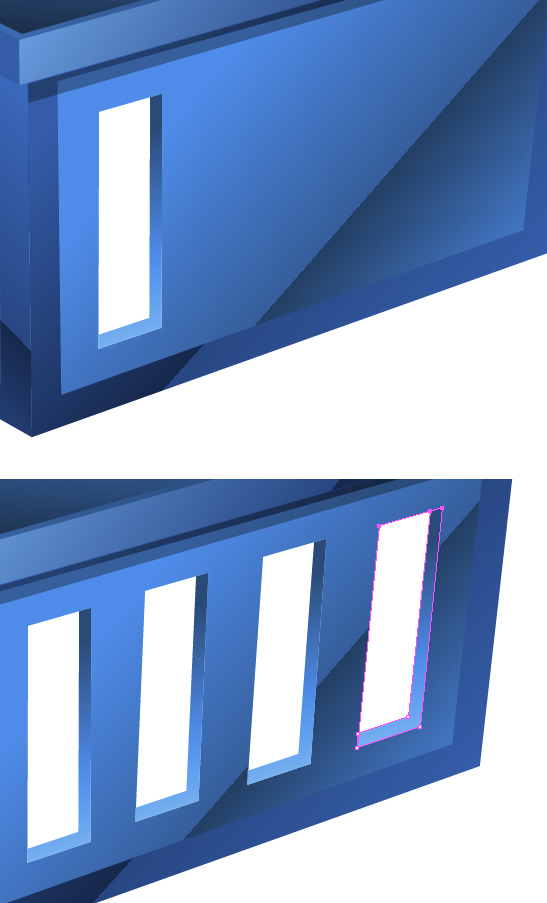
You will be left with a shape that looks like the edge of a window.
Step 17
Since the main window shape is still on the clipboard press Option + F to paste the window shape precisely where you copied it from. You can now use this shape to create the other windows. Since the basket shape tapers down toward the bottom you will need to adjust each window ever-so-slightly to make them look correct. Use the Direct Selection Tool to adjust each window shape.
Step 18
Draw the windows on the other face of the basket.Select each window shape on the face of one side of the basket and give them a brown to black gradient simultaneously. This will guarantee that the gradient is uniform and consistent across all the windows.

Step 19
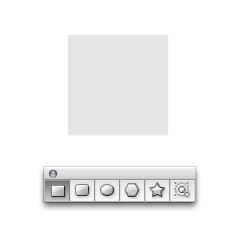
To make the boxes that go inside the basket first draw a square shape.
Step 20
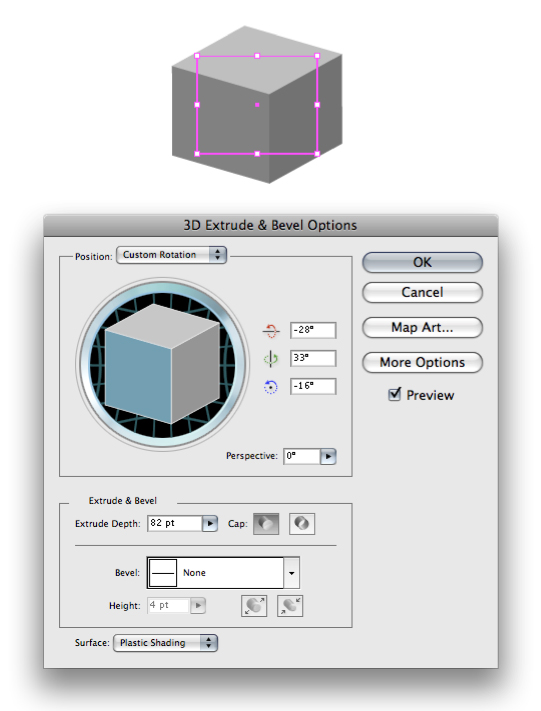
Go to Effect > 3D > Extrude & Bevel. Enter the variables below and click OK.
Step 21
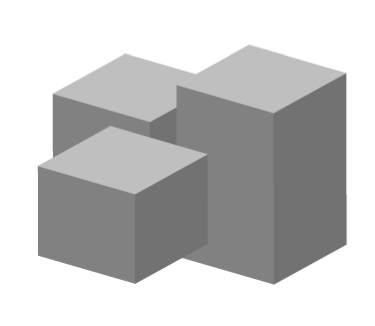
Copy and paste the boxes a couple times and change the Extrude depth to make different heights of boxes.
Step 22
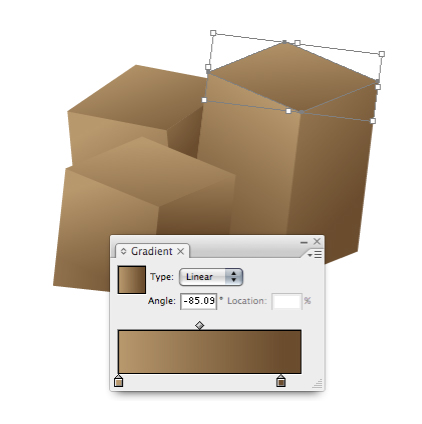
To continue working with the boxes you will need to expand them by going to Object > Expand Appearance. Very important: Ungroup all the boxes until you can no longer ungroup them. To ungroup the boxes go to Object > Ungroup.Next, rotate the boxes so they’re all on slightly different angles. Give them a warm brown gradient making sure to vary the brightness of each side of the box to create a more realistic look.

Step 23
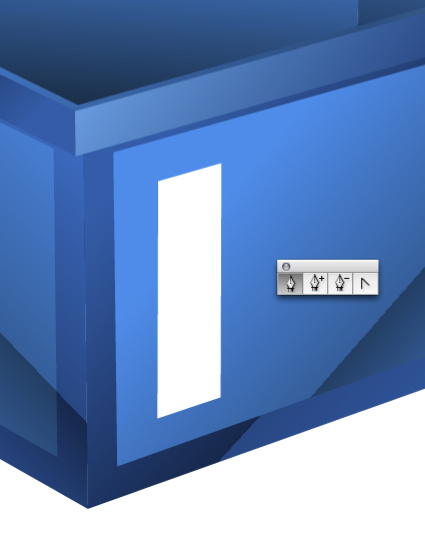
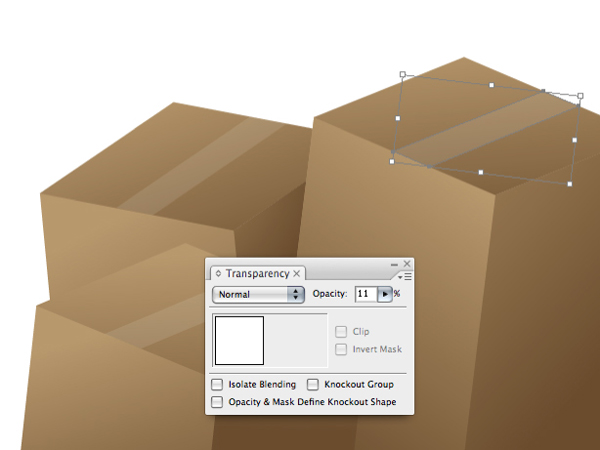
Add a little more detail by copy and pasting the top of the box and using the Direct Selection Tool to reshape the object to look like a piece of tape. Fill the shape with white and adjust the Opacity in the Transparency Palette to about 10%.
Step 24
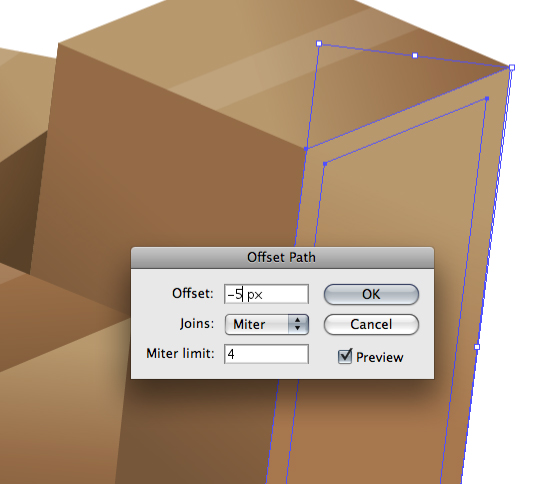
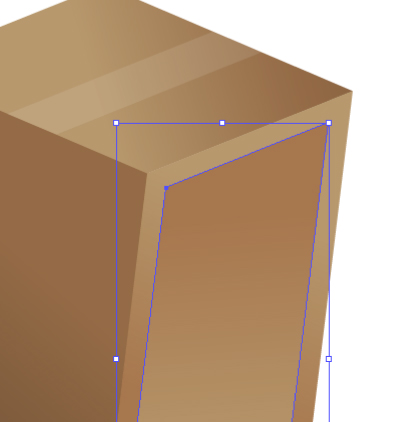
Go to Object > Path > Offset Path and enter -5 then click OK.
Step 25
Select the inner shape and adjust the gradient so it doesn’t blend into the other shape behind it.
Step 26
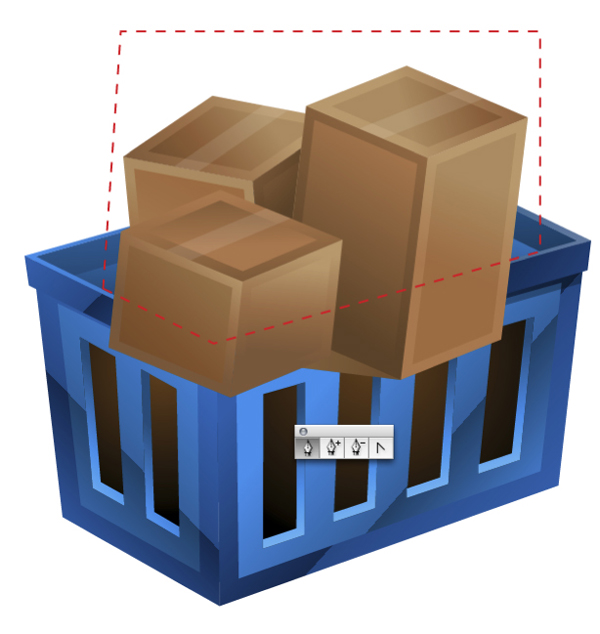
A quick way to make it look as if the boxes are inside the basket is to apply a Clipping Mask to the them.Using the Pen Tool draw a line where the dotted line is. Your line won’t need a fill or stroke color. The red line below is just for representation.

Step 27
Make sure the shape you just drew is in front of the boxes. Select all the boxes and select the mask shape then go to Object > Clipping Mask > Make. Your boxes will instantly look like they’re inside of the basket!If you would like to further edit the color or shape of the boxes double-click on them to enter into what is called Isolation Mode (Illustrator CS3 and up) and adjust them to your liking.

Step 28
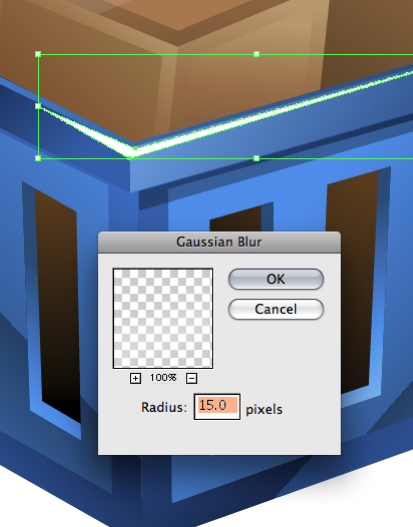
Create some highlights on the basket by first drawing a basic shape with the Pen Tool. Go to Effect > Blur > Gaussian Blur and enter a variable that looks good to you.
Step 29
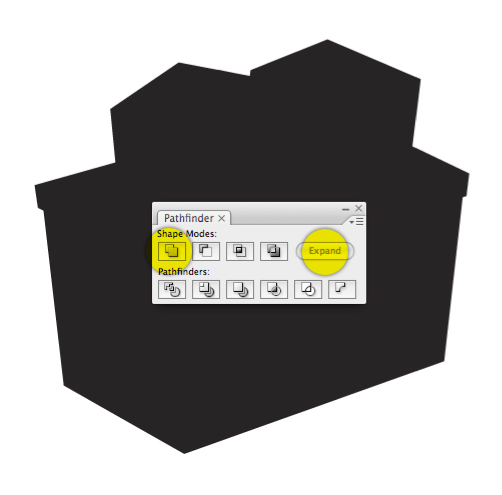
Copy and paste all the elements thus far. Select the copy you just made and in the Pathfinder Palette select Add to Shape Area followed by Expand.
Step 30
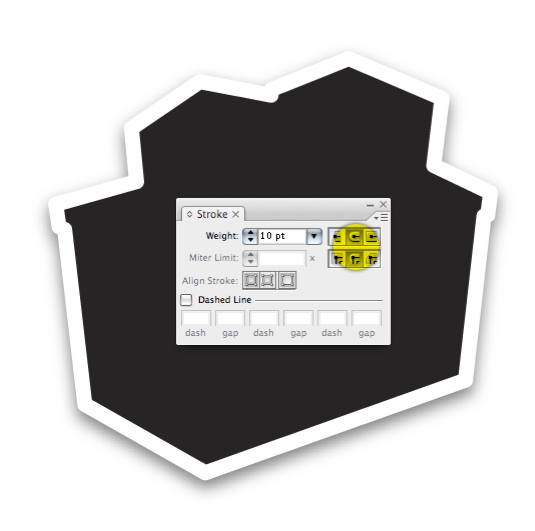
Give this shape a thick stroke. Set the caps to Round and Join as highlighted below. Next give the shape a drop shadow by going to Effect > Stylize > Drop Shadow.
Step 31
Put the shape behind everything else.
Step 32
You can easily make this icon into a set by changing the windows to a blue to black gradient and making an arrow out of a triangle and square shape.
Final Image
Here it is, the final shopping basket icons.